
IT Help Desk
Having technology issues on-campus or problems accessing campus resources off-campus? Call or email the IT Help Desk. You can also submit an IT job ticket directly into our system.
Upcoming Maintenance
Maintenance: None Planned
Services Impacted:
Services Down: N/A
Services Up:
Who’s at the Help Desk?
The help desk schedule is currently being revised and will be posted soon.
How to Submit an IT Help Desk Ticket
Before you submit a ticket… you must have a permanent password for your MyAU, Canvas, or Avila email account.
Submit an IT Help Desk Ticket using the Help Button below or at the bottom right of your screen.
IT Resources
What Happens to My Email & Accounts After I Leave Avila
Students will lose access to most services and accounts—including email—210 days after they leave the University.
Steps to access the app server from a Macintosh computer
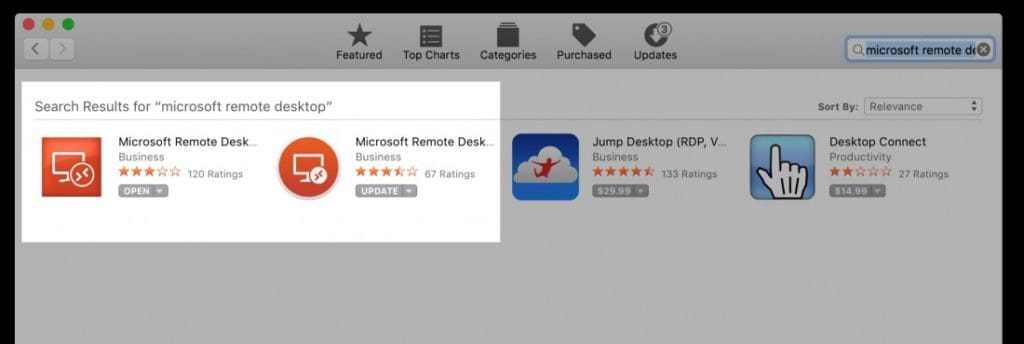
Head to the app store and download the Microsoft Remote Desktop application (version 8 or 10 works). The steps for both version 8 and 10 are listed below.
VERSION 8 INSTRUCTIONS
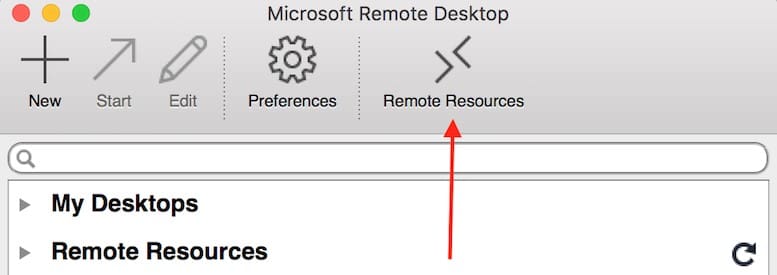
1- Once you have the program downloaded, you will need to add the remote resources URL, it is in different locations depending on which version of Microsoft Remote Desktop you are running. Here are the steps for Version 8 (Square icon).
2- The URL for the remote resources will need to be added in at this time. The URL that needs to be entered is: https://apps.avila.edu/RDWeb/Feed/webfeed.aspx
For version 8 the field looks like this (after clicking on the remote resources in the picture in step 1 Fig. 1). It will look like this:
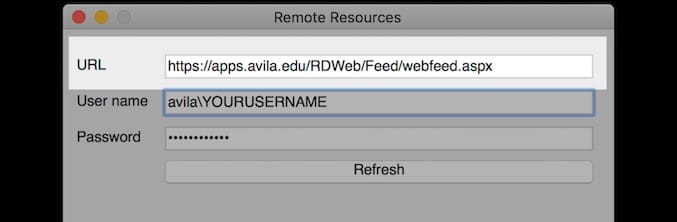
3- Once you have the URL in the URL field, you will need to put in your username in the field below – Your username will need to be preceded by “Avila” – so the username should be like avilasmith123456 (do NOT put @avila.edu at the end of your username).
4- With the username added, provide the password that you use to log into online campus resources.
5- Hit the refresh button at the bottom of the window and press the red circle/x in the upper left, and you will see the list of applications available. Double click to open the application you want to run.
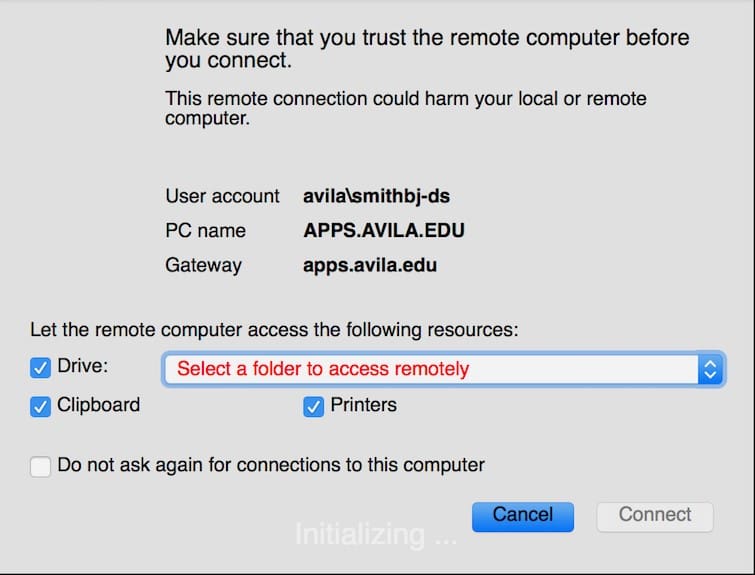
6- If you see the following message when launching a program:
This is asking you to select a location ON YOUR COMPUTER where the remote server can save your files.
VERSION 10 INSTRUCTIONS
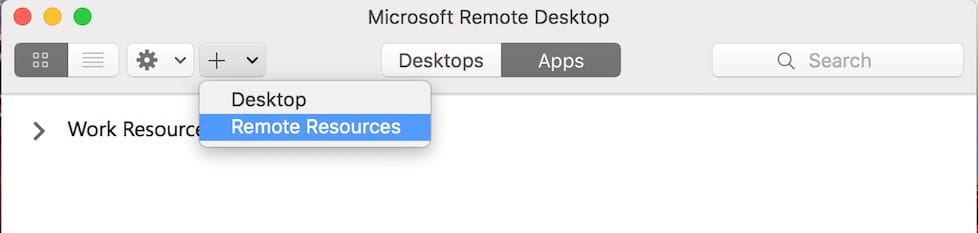
1- Once you have the program downloaded, you will need to add the remote resources URL, it is in different locations depending on which version of Microsoft Remote Desktop you are running. Here are the steps for Version 10 (Circle icon).
2- The URL for the remote resources will need to be added in at this time. The URL that needs to be entered is: https://apps.avila.edu/RDWeb/Feed/webfeed.aspx
For version 10 the field looks like this (after clicking on the remote resources in the picture in step 1 Fig. 3). It will look like this:

3- Once you have the URL in the URL field, select “add user account” – Your username will be need to be preceded by “avila” – so the username should be like: avilasmith123456 (do NOT put @avila.edu at the end of your username).
4- With the username added, provide your password that you use to log into online campus resources.
5- Hit save, and add feed. The remote applications will show up under the apps button:
6- Double click to open the application you want to run.

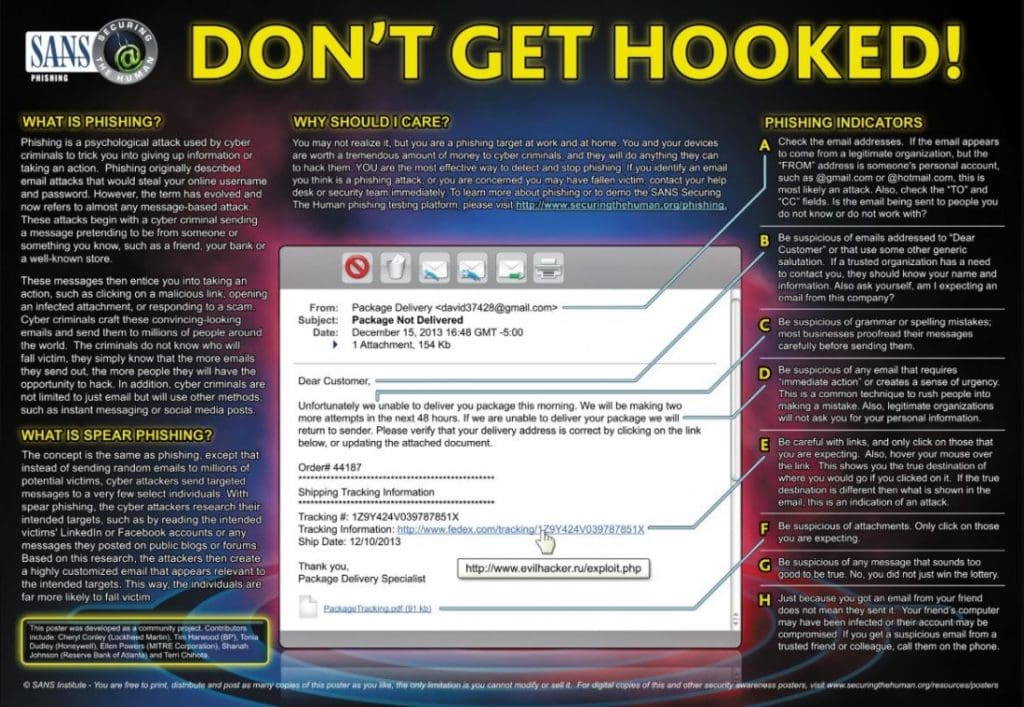
Phishing Emails
How to identify viruses in emails to avoid possibly opening and getting infected with the virus.
- Look at the sender’s email address – These email addresses can be spoofed to look like someone you know, but also, they could be one that has a different country’s domain on it (example.com.ru, or support@microsoft.com)
- Look at the Subject line – Does it create a sense of urgency? These are typically viruses. Does it have 1 word in it but appears to be a response like “Re: Document”? Final Warning – This is also a telltale sign of a virus.
- Look at the body of the message – If the sender is a recognized sender, does it follow their normal emailing criteria – Does it have a salutation – is it directed to you specifically, or is it generic (Hi, vs Hi Adam,). Does it have a signature for the person who sent it? Does it match the name of the person you identified in the email address above? Does it have the company’s contact information and/or graphics that you’ve been accustomed to seeing if you’ve received mail from them before?
- Look at the content of the body – Is it just asking you to open a file or go to a website link?
- Look at the direction of the message – Does it ask you to open the attached file? Does it create a sense of urgency? With viruses, the purpose of the body is to entice you to open the attachment. A common method is by fear and urgency.
- Look at the attachment – is it a zip file? Is it a PDF? Is it a docx or doc? – how big is it? If it’s really small, around 1kb to 22kb, it is most likely a virus – couple this information with the above identifying marks above, and you will have a very good indication that it’s a virus. This is not always the case anymore as I saw 1 virus that had a 440kb PDF attachment, but if you looked at the rest of the steps outlined above, it failed 2,3,4 and 5.
Secure Printing also called Locked Print
For use with Windows Operating Systems
Secure printing ensures that your confidential document can only be printed while you are standing at the printer. These directions assume you are printing from Microsoft Word, but once you get to Printer Properties, the procedure will be exactly the same.
- In Word, from the File menu, select Print.
- Select the printer (This will work on all of the large printers on campus).
- Click on Printer Properties.
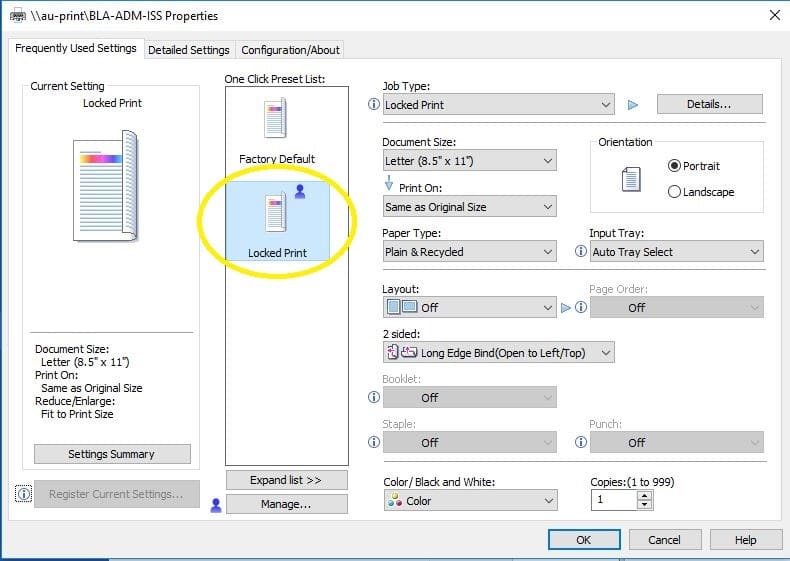
4. From the Job Type drop-down, select Locked Print.

5. Click Details. A Job Type Details dialog box will open.
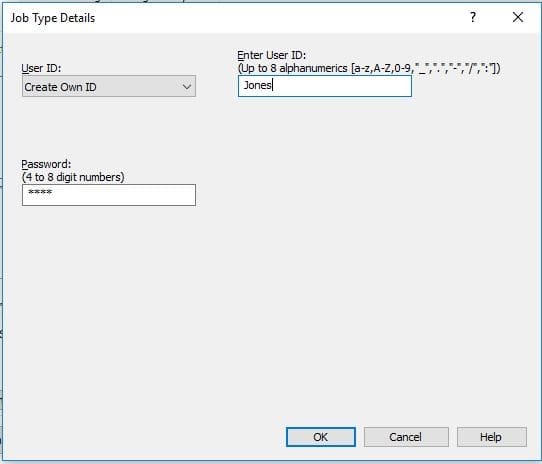
6. Make sure the drop-down for User ID has Create Own ID
7. Under Enter User ID, enter an identifier up to 8 alphanumeric characters (Suggest using your name to help you identify your print jobs when you’re standing at the printer).
8. Enter a password of 4 to 8 numbers. NUMBERS ONLY
9. Click OK to close the Job Type Details dialog box.
10. (Optional but recommended) To save these settings to make it easier to use Secure Printing in the future, click Register Current Settings, enter a One Click Preset Name (we suggest Locked Print), then click OK.
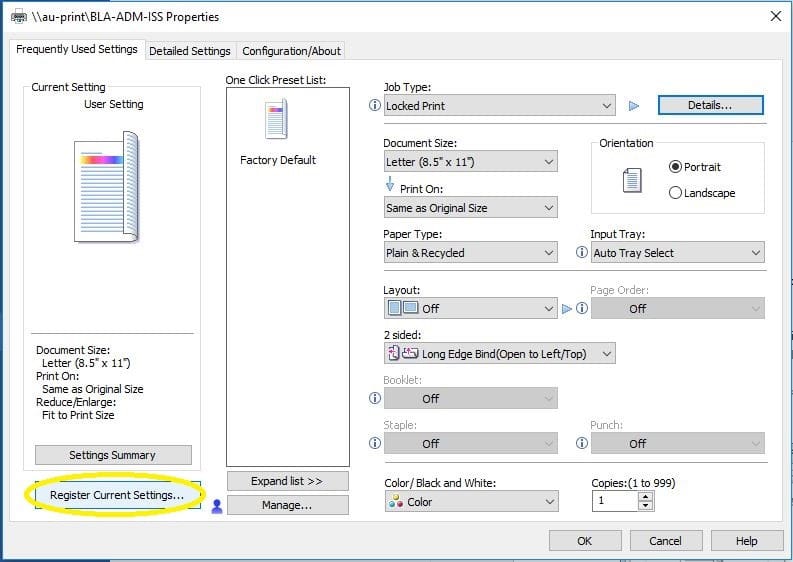
The next time you need to print securely, in the One Click Preset List on the Printer Properties dialog box, click Locked Print (or whatever you called it) and all your settings from steps 4-9 above will be applied.
11. Click OK to close the Printer Properties dialog box.
12. Adjust any print settings like the number of copies or which pages to print, if needed.
13. Click Print.
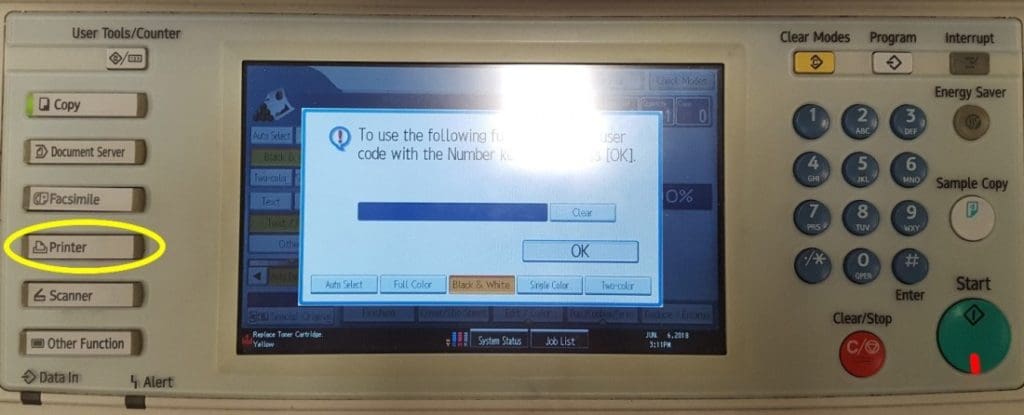
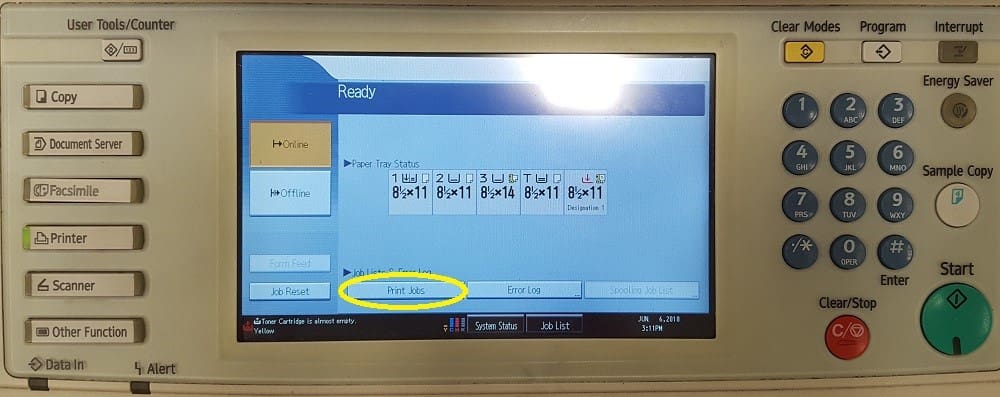
Go to the printer to print the document.
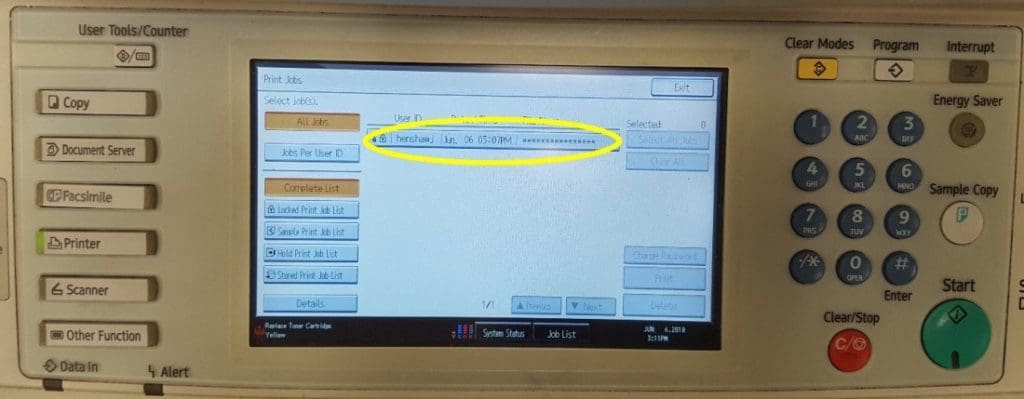
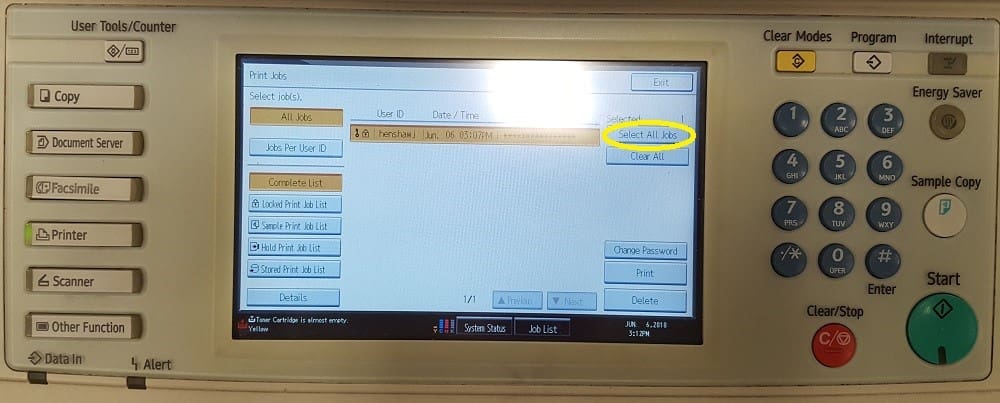
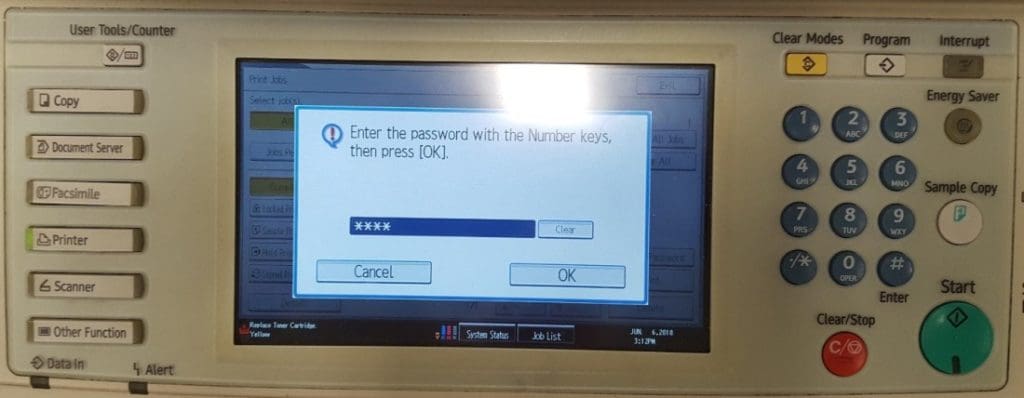
Note: You may print numerous jobs that will be held on the printer’s hard drive until you release them with your password. The printer is set to store print jobs for 3 days, after the 3rd day it will then erase the print job and you will need to reprint.